


If you're someone who loves jewelry and wants to add a personal touch to your accessory collection, then you've come to the right place! Today, we're going to dive into the world of DIY jewelry-making and explore the art of creating stunning pearl bracelets right in the comfort of your own home. So, if you're wondering how to make pearl bracelets at home, get ready to unleash your creativity and embark on a fun and fulfilling crafting adventure!
When it comes to making pearl bracelets, the possibilities are endless. Whether you prefer a classic and elegant design or a more boho-chic and eclectic style, there's a pearl bracelet out there that's perfect for you. In this article, we'll guide you through the step-by-step process of creating your very own pearl bracelets, from selecting the right materials to mastering the techniques required to string those lustrous pearls together. So, let's grab our tools, gather our supplies, and get ready to make some stunning pearl bracelets that will surely turn heads wherever you go!
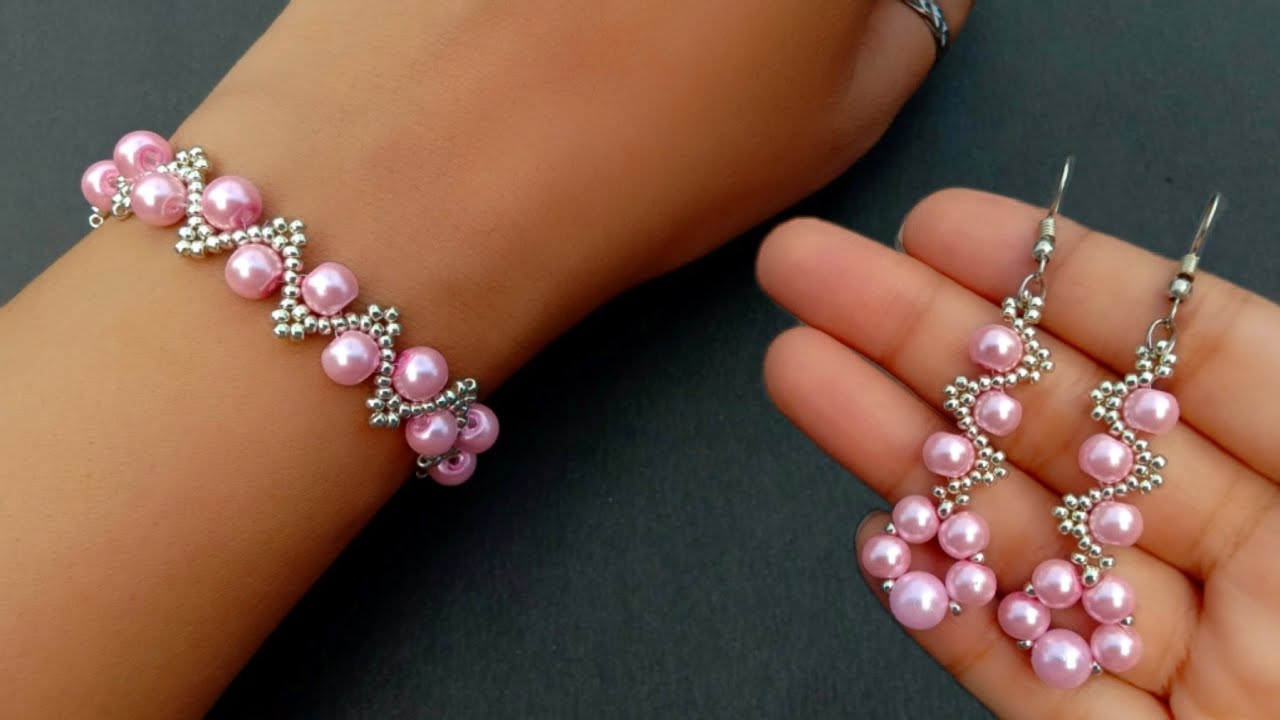
How to Make Pearl Bracelets at Home
Step 1: Gather your materials, including a string or elastic cord, pearls of your choice, and a clasp.
Step 2: Measure your wrist and cut the cord to the desired length, leaving some extra for tying.
Step 3: String the pearls onto the cord, creating your desired pattern.
Step 4: Tie a secure knot at the end and attach the clasp.
Step 5: Trim any excess cord and your pearl bracelet is ready to wear!
How to Make Pearl Bracelets at Home: A Step-by-Step Guide
Are you fascinated by the elegance and beauty of pearl bracelets? Do you want to add a personal touch to your jewelry collection by creating your own pearl bracelets at home? Look no further! In this article, we will guide you through the process of making stunning pearl bracelets from the comfort of your own home. With a few simple materials and a little bit of creativity, you can design unique and stylish pearl bracelets that will be the envy of your friends. Let's dive in and discover the art of making pearl bracelets!
1. Gather Your Materials
Before you begin making your pearl bracelets, it's important to gather all the necessary materials. Here's a list of what you'll need:
- Pearls: Choose pearls of your preferred size, color, and shape. You can opt for freshwater pearls, glass pearls, or even faux pearls.
- Stringing Material: Select a strong and durable stringing material such as nylon thread, silk thread, or stretch cord.
- Clasps: Choose a suitable clasp to secure your bracelet. Lobster clasps and toggle clasps are popular choices.
- Jump Rings: These small metal rings will help attach the clasp to your bracelet.
- Wire Cutters: You'll need wire cutters to trim the excess stringing material.
- Jewelry Pliers: Pliers will come in handy for opening and closing jump rings.
- Tape: Use tape to secure the ends of the stringing material.
Once you have all these materials ready, you're all set to start creating your own pearl bracelets!
2. Plan Your Design
Before you begin stringing the pearls onto your bracelet, it's a good idea to plan out your design. Think about the pattern, color combinations, and spacing between the pearls. Consider whether you want a symmetrical or asymmetrical design, and how long you want your bracelet to be. Planning your design in advance will help ensure that you create a bracelet that meets your aesthetic preferences.
Once you have a clear vision of your design, you can start stringing the pearls onto your bracelet!
2.1 Stringing the Pearls
Take your chosen stringing material and cut it to the desired length for your bracelet. Make sure to leave some extra length for attaching the clasp. Secure one end of the stringing material with tape to prevent the pearls from slipping off.
Next, thread the pearls onto the stringing material in the desired pattern. You can use a beading needle to help guide the stringing material through the small holes in the pearls. Be mindful of the spacing between the pearls to achieve your desired design.
Continue stringing the pearls until you reach the desired length for your bracelet. Remember to keep the other end of the stringing material secured with tape to prevent the pearls from falling off.
2.2 Adding the Clasp
Once you have finished stringing the pearls, it's time to add the clasp. Use jewelry pliers to open a jump ring and attach it to one end of the bracelet. Then, attach the clasp to the jump ring and close it securely using the pliers. Repeat this process on the other end of the bracelet.
After attaching the clasp, trim any excess stringing material using wire cutters. Be careful not to cut the bracelet itself.
And there you have it! Your very own handmade pearl bracelet ready to be worn or gifted to a loved one.
3. Tips for Creating Stunning Pearl Bracelets
Creating pearl bracelets can be a fun and rewarding experience. Here are some tips to help you create stunning bracelets:
- Experiment with different pearl sizes, shapes, and colors to add visual interest to your bracelets.
- Combine pearls with other beads or charms to create unique and personalized designs.
- Consider using different stringing techniques, such as knotting between each pearl, to add texture and durability to your bracelets.
- Take your time when stringing the pearls to ensure they are evenly spaced and securely attached to the stringing material.
- Get inspiration from jewelry-making books, online tutorials, or even nature to come up with creative designs.
By following these tips and letting your creativity flow, you'll be able to create beautiful pearl bracelets that reflect your personal style.
Additional Resources
If you're looking for more inspiration and guidance, here are some additional resources to explore:
- Online jewelry-making communities: Join online forums or social media groups dedicated to jewelry making to connect with fellow enthusiasts and learn from their experiences.
- Video tutorials: Check out video tutorials on platforms like YouTube to visually guide you through the process of making pearl bracelets.
- Local craft stores: Visit your local craft stores to find a wide selection of pearls, stringing materials, and jewelry-making tools.
Remember, practice makes perfect, so don't be discouraged if your first attempts at making pearl bracelets don't turn out exactly as you envisioned. Keep experimenting, honing your skills, and soon you'll be creating stunning pearl bracelets that will be cherished for years to come!
Key Takeaways: How to Make Pearl Bracelets at Home?
- Measure your wrist and cut the beading thread to the desired length.
- Thread the needle and string the pearls onto the thread, creating your desired pattern.
- Secure the pearls by tying knots between each one.
- Attach the clasp to the ends of the thread and secure it with knots for a finished bracelet.
Frequently Asked Questions
What materials do I need to make pearl bracelets at home?
To make pearl bracelets at home, you will need the following materials:
- Pearls: You can choose different sizes and colors of pearls depending on your preference. Make sure they have a hole in the center for stringing.
- Beading thread or elastic cord: This will be used to string the pearls together. Beading thread is more secure, while elastic cord offers flexibility.
- Needle and thread (optional): If you are using beading thread, you may need a needle to help thread the pearls.
- Clasp: You will need a clasp to secure the bracelet. There are various types of clasps available, such as lobster clasps or toggle clasps.
- Jewelry findings: These include jump rings and crimp beads, which are used to attach the clasp to the bracelet.
How do I choose the right size for my pearl bracelet?
When choosing the size for your pearl bracelet, consider the following:
- Wrist size: Measure your wrist using a flexible measuring tape. Add about 1 inch (2.5 cm) to this measurement for a comfortable fit.
- Bracelet style: If you prefer a looser fit, add more inches to your wrist measurement. If you prefer a snug fit, add fewer inches.
- Pearl size: Keep in mind that larger pearls will take up more space on the bracelet, so you may need to adjust the length accordingly.
- Clasp size: Take into account the size of the clasp when determining the length of your bracelet. Make sure it is proportionate to the overall design.
How do I string the pearls onto the beading thread?
To string the pearls onto the beading thread, follow these steps:
1. Cut a length of beading thread that is slightly longer than your desired bracelet length.
2. If using a needle, thread it onto one end of the beading thread.
3. Slide a crimp bead onto the thread, leaving a small tail of thread after the bead.
4. Thread the needle (or the other end of the thread) through the hole of the clasp, and then back through the crimp bead.
5. Pull the thread tight to secure the clasp, and use flat nose pliers to flatten the crimp bead.
6. Begin stringing the pearls onto the thread, alternating sizes and colors as desired.
7. Repeat steps 3-5 to attach the other end of the clasp to the thread once all the pearls are strung.
8. Trim any excess thread, and your pearl bracelet is ready to wear!
Can I use elastic cord instead of beading thread?
Yes, you can use elastic cord instead of beading thread to make a pearl bracelet. Elastic cord offers the advantage of easy wear and removal without the need for a clasp. Here's how to make a pearl bracelet with elastic cord:
1. Cut a length of elastic cord that is slightly longer than your desired bracelet length.
2. Thread one end of the cord through a crimp bead, leaving a small tail.
3. Thread the other end of the cord through the same crimp bead, creating a loop.
4. Pull both ends of the cord tightly to secure the loop, and use flat nose pliers to flatten the crimp bead.
5. Begin stringing the pearls onto the elastic cord, alternating sizes and colors as desired.
6. Once all the pearls are strung, thread the ends of the cord through another crimp bead.
7. Pull the cord ends tightly to create a loop, and flatten the crimp bead with pliers.
8. Trim any excess cord, and your pearl bracelet is ready to wear!
How do I care for my pearl bracelet?
To keep your pearl bracelet looking its best, follow these care tips:
- Avoid exposing your pearl bracelet to harsh chemicals, such as perfume or hairspray, as they can damage the pearls.
- Remove your bracelet before engaging in activities that may cause it to get scratched or damaged.
- Clean your pearl bracelet gently with a soft cloth after each wear to remove any dirt or oils.
- Store your bracelet in a soft pouch or jewelry box to prevent it from getting tangled or scratched.
- Avoid exposing your pearls to excessive heat or direct sunlight, as this can cause them to fade or become discolored.
By following these care instructions, your pearl bracelet will stay beautiful and last for years to come.
Final Thoughts: Create Stunning Pearl Bracelets from the Comfort of Your Home!
So there you have it, folks! Now you know how to make gorgeous pearl bracelets right in the comfort of your own home. With just a few simple steps and some creative flair, you can design and craft stunning accessories that are sure to turn heads. Whether you're a beginner or a seasoned DIY enthusiast, making pearl bracelets is a fun and rewarding activity that allows you to express your personal style.
Remember, when it comes to making pearl bracelets, the possibilities are endless. You can mix and match different types of pearls, experiment with various colors and sizes, and even incorporate other beads or charms for a unique touch. Don't be afraid to let your imagination run wild and create designs that truly reflect your personality.
Not only is making pearl bracelets a creative outlet, but it also offers a great opportunity to bond with loved ones. Consider hosting a bracelet-making party with friends or family, where everyone can showcase their individual style and create beautiful pieces together. It's a wonderful way to spend quality time and create lasting memories.
So why wait? Gather your materials, follow the steps we've discussed, and let your creativity shine through as you embark on your journey to make stunning pearl bracelets. Get ready to receive compliments and inquiries about your beautiful handmade pieces. Remember, the key to success is practice, so don't be discouraged if your first attempt doesn't turn out perfect. Keep honing your skills, and soon enough, you'll be creating jewelry that rivals those found in high-end boutiques. Happy crafting!


